WordPress powers over 40% of all websites on the internet. That popularity makes it the biggest target for hackers, bots, and automated attacks.
For small business owners in Ghana and across Africa, a WordPress security checklist is not optional. Ghana recorded 4,753 DDoS attacks in the first half of 2024 alone — the highest volume in West Africa.
Your website is a business asset. Protecting it takes the right hosting foundation, a handful of smart configurations, and a monthly routine you can finish in 30 minutes.
This guide gives you a practical, 10-step checklist you can start today — no developer required.
Is WordPress Safe for Business Websites?
Yes. WordPress core is well-maintained and secure. In 2025, only 6 vulnerabilities were found in WordPress core itself.
The real risk sits in plugins and themes. A staggering 91% of WordPress vulnerabilities originate from plugins. That means the software you add to your site — not WordPress itself — creates the openings attackers exploit.
The other factor is human error. Weak passwords, skipped updates, and unused plugins left installed are the doors most hackers walk through.
WordPress is safe for business when you treat security as a decision you make at two levels: your hosting infrastructure and your site configuration. Get both right, and your site is well-protected.
What Are the Most Common WordPress Security Threats?
Before you lock down your site, understand what you are defending against.
Cross-Site Scripting (XSS) accounts for 47.7% of all new WordPress vulnerabilities. XSS attacks inject malicious code into your pages, which then runs in your visitors’ browsers.
Broken Access Control follows at 14.2%, where attackers gain admin-level access they should not have. Cross-Site Request Forgery (CSRF) rounds out the top three at 11.4%.
The speed of exploitation is alarming. The median time from vulnerability disclosure to mass exploitation is just 5 hours for heavily targeted WordPress vulnerabilities. That means once a flaw becomes public, attackers race to exploit every unpatched site before owners even see the news.
Small businesses face disproportionate risk. According to the Verizon 2025 Data Breach Investigations Report, 88% of data breaches involving SMBs contained a ransomware component, compared to 39% for large enterprises. Smaller teams often lack dedicated security staff, making automated protection through your hosting provider even more critical.
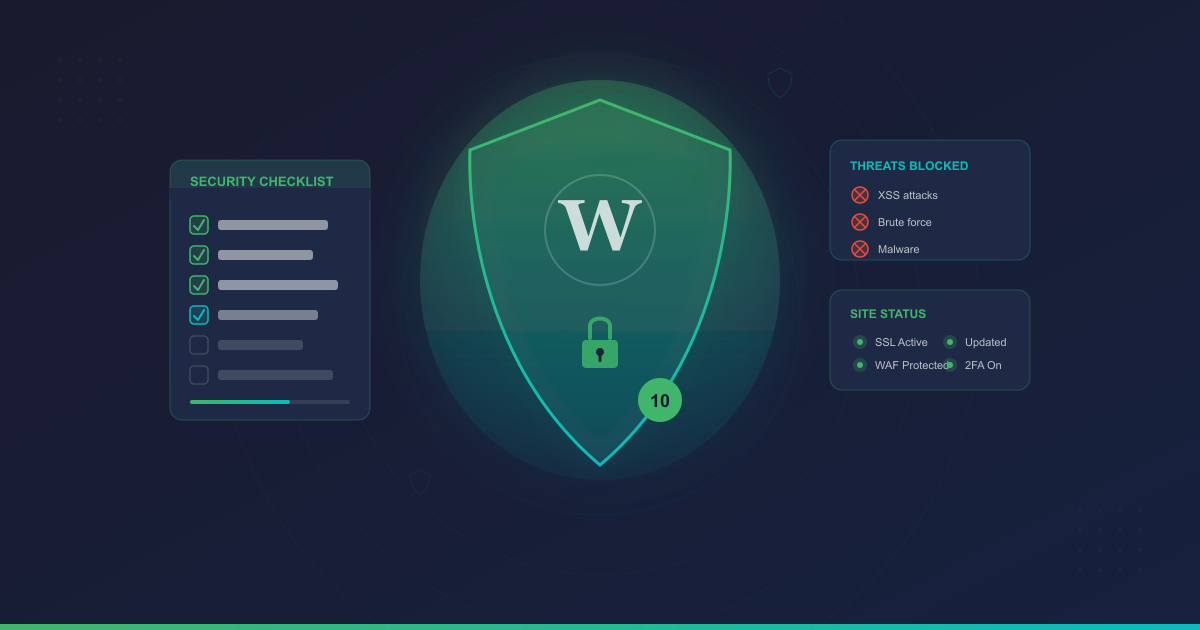
The 10-Step WordPress Security Checklist
Follow these steps in order. Each one builds on the previous, creating layered security that stops the vast majority of attacks. This WordPress security checklist covers everything from hosting infrastructure to monthly maintenance.
Step 1: Choose Hosting That Protects You
Your hosting provider is your first line of defense. Before you install a single plugin, server-level security is already working — or it is not.
Traditional hosting defenses blocked only 26% of WordPress vulnerability attacks in large-scale penetration testing. That means if your host relies on basic firewalls alone, three out of four attacks slip through. Understanding how WordPress hosting works at the server level reveals why this matters.
Look for hosting that includes:
- Server-level malware scanning (such as Imunify360) that detects threats before they reach your WordPress installation
- Web Application Firewall (WAF) at the server level to filter malicious traffic
- DDoS protection — particularly important in West Africa where attack volumes are rising
- Automated backups so you can restore your site if something goes wrong
- Free SSL certificates for encrypted connections on every page

LUMINWEB WordPress Hosting includes Imunify360 security, free SSL, and automated backups on every plan. Your security starts at the server level, before your site even loads.
Step 2: Keep Everything Updated
Outdated software is the easiest way in for attackers. In 2025, 11,334 new security vulnerabilities were discovered in the WordPress ecosystem — a 42% increase from the previous year.
Even more concerning: 46% of those vulnerabilities had no patch available at the time of public disclosure. That means nearly half of known security flaws were exposed before a fix existed.
Here is your update routine:
- WordPress core: Enable automatic updates for minor releases (security patches). Review major releases before updating.
- Plugins: Check for updates weekly. Read changelogs before updating — security fixes are usually noted.
- Themes: Update your active theme when releases arrive. Delete any themes you are not using.
- PHP version: Keep your server running a supported PHP version. Your hosting control panel (cPanel or DirectAdmin) lets you check and switch versions.
Before any major update, create a backup. If something breaks, you can restore in minutes. Our WordPress backup guide walks you through four reliable methods.
Step 3: Use Strong Passwords and Unique Usernames
Never use “admin” as your WordPress username. Attackers try it first in every brute force attempt.
Create a unique username that is not your name, your business name, or anything publicly visible on your site. Then pair it with a strong password:
- 20+ characters combining uppercase, lowercase, numbers, and symbols
- Unique to WordPress — never reuse passwords across sites
- Use a password manager like Bitwarden (free) or 1Password to generate and store passwords securely
Apply the same standard to every WordPress user account on your site. One weak account is all an attacker needs.
Step 4: Enable Two-Factor Authentication (2FA)
Two-factor authentication adds a second verification step after your password. Even if an attacker steals your credentials, they cannot log in without the second factor.
2FA is one of the single most effective security measures you can implement. Here is how to set it up:
- Install a free 2FA plugin: WP 2FA or Two Factor are both reliable
- Connect it to an authenticator app on your phone (Google Authenticator or Authy)
- Enable 2FA for every admin and editor account on your site
- Store backup codes in a safe place in case you lose access to your phone
This one step blocks the majority of brute force login attacks.
Your hosting is your first layer of defense. LUMINWEB WordPress Hosting includes Imunify360 malware scanning and firewall protection on every plan — so your site is secured at the server level before plugins even load.
Step 5: Install a Security Plugin
A security plugin adds monitoring, scanning, and protection at the WordPress level. It complements your web hosting security — it does not replace it.
Here are three solid options:
| Plugin | Best For | Key Features | Cost |
|---|---|---|---|
| Wordfence | Comprehensive protection | Firewall, malware scanner, login security, live traffic monitoring | Free tier available |
| Sucuri Security | Cloud-based WAF | Cloud firewall, malware monitoring, post-hack cleanup, CDN | Free tier available |
| All-In-One Security | Beginners | User-friendly interface, login lockdown, file integrity monitoring | Free |

Choose one. Do not stack multiple security plugins — they conflict with each other and slow your site down. Pick the one that matches your comfort level and let it work alongside your server-level protection. For more recommendations, see our essential WordPress plugins guide.
Step 6: Set Up a Web Application Firewall (WAF)
A Web Application Firewall (WAF) filters malicious traffic before it reaches your site. It blocks the most common attack types: XSS injections, SQL injection, and CSRF attacks.
You have two options:
- Cloud-based WAF: Cloudflare offers a free tier that includes basic WAF protection, DDoS mitigation, and a CDN that speeds up your site. Your traffic routes through Cloudflare’s network, where threats are filtered before reaching your server.
- Plugin-based WAF: Wordfence and Sucuri both include WAF functionality. These run on your server and filter requests at the WordPress level.
For the strongest protection, use both: a cloud WAF (Cloudflare free tier) in front of your hosting, plus your server-level Imunify360 protection behind it. This creates two layers of filtering.
Step 7: Enable SSL/HTTPS on Every Page
SSL (Secure Sockets Layer) encrypts the connection between your visitors’ browsers and your website. Without it, login credentials, form submissions, and payment data travel in plain text — visible to anyone monitoring the connection.
SSL is no longer optional. Google uses HTTPS as a ranking signal. Payment processors require it. And visitors see a “Not Secure” warning in their browser without it.
LUMINWEB includes free SSL certificates on every hosting plan. Activate yours through cPanel or DirectAdmin in under five minutes.
After enabling SSL:
- Update your WordPress URL settings to use
https:// - Install a plugin like Really Simple SSL to handle redirects automatically
- Check for mixed content — images or scripts still loading over
http://
Step 8: Configure Automated Backups
Backups are your safety net. If your site is compromised, a clean backup lets you restore everything in minutes instead of days.
Follow these backup rules:
- Frequency: Daily for e-commerce or WooCommerce stores. Weekly for blogs and informational sites.
- Storage: Always store backups offsite — not on the same server as your website. Cloud storage (Google Drive, Dropbox) or a dedicated backup service works.
- Testing: Restore a backup at least once per quarter to confirm it actually works. Untested backups are not backups.
- Retention: Keep at least 30 days of backup history so you can roll back past a security incident you did not catch immediately.
LUMINWEB WordPress Hosting includes automated backups on every plan. For additional backup strategies, our WordPress backup guide covers four methods to keep your site recoverable.
Step 9: Limit Login Attempts
Brute force attacks hammer your login page with thousands of username-password combinations per hour. Limiting login attempts shuts this down.
Install Limit Login Attempts Reloaded (free plugin). Configure it to:
- Lock out an IP address after 3-4 failed attempts
- Set a lockout duration of 20-30 minutes
- Increase lockout time after repeated lockouts from the same IP
- Email you when lockouts occur so you can spot patterns
Pair this with the 2FA you set up in Step 4 for layered login defense. Even if an attacker guesses your password within those attempts, 2FA stops them cold.
Step 10: Remove Unused Plugins and Themes
Every plugin on your site — even deactivated ones — is a potential entry point. Remember: 91% of WordPress vulnerabilities come from plugins.
Deactivating a plugin does not remove the risk. The code is still on your server. Attackers can exploit vulnerabilities in deactivated plugins just as easily as active ones.
Make this a monthly habit:
- Review every installed plugin. Ask: “Am I actively using this?”
- Delete (not just deactivate) anything you do not need
- Delete all inactive themes except one default theme (keep Twenty Twenty-Five as a fallback)
- Before installing any new plugin, check its last update date, active installations, and user reviews
Fewer plugins means fewer vulnerabilities. Every plugin you remove closes a potential door.
Bonus: Your Monthly Security Audit Routine
Security is not a one-time setup. Set a recurring monthly calendar reminder and run through this quick audit:
- User accounts: Remove any accounts that no longer need access. Verify all admin accounts are legitimate.
- Plugin audit: Delete unused plugins. Update everything current.
- File permissions: Confirm wp-config.php is set to 440 or 400 (not world-readable).
- Security scan: Run your security plugin’s malware scan and review the results.
- Login logs: Check for unusual login attempts or lockouts from unexpected locations.
- Backup test: Verify your most recent backup is complete and stored offsite.
This entire routine takes 20-30 minutes. It is the most valuable half-hour you can spend on your website each month.
For a broader perspective on keeping your site healthy, our website maintenance checklist covers the hosting and performance tasks that complement your security routine.
What to Do If Your WordPress Site Gets Hacked
If you suspect your site has been compromised, act immediately:
- Contact your hosting provider. They can isolate your account, scan for malware at the server level, and advise on next steps.
- Restore from a clean backup. This is the fastest path to recovery — which is why Step 8 matters so much.
- Change every password. WordPress admin, hosting account, FTP, database, and email.
- Run a full malware scan. Use your security plugin and your host’s server-level scanner.
- Update everything. Core, plugins, themes — all of them.
- Review user accounts. Delete any accounts you did not create.
- Check Google Search Console. Look for security warnings or flagged pages.
The faster you respond, the less damage an attacker can do. Having automated backups and server-level security from your hosting provider makes recovery dramatically faster.
Frequently Asked Questions
Is WordPress safe for business websites?
Yes. WordPress core is actively maintained by a global security team. In 2025, only 6 vulnerabilities were found in WordPress core. The vast majority of security issues come from plugins (91%) and human configuration errors. When properly secured with the right hosting and configurations, WordPress is a reliable platform for business.
How much does WordPress security cost?
The essentials cost nothing extra. Free SSL (included with quality hosting), free 2FA plugins, free security plugins (Wordfence, Sucuri, AIOS), and free Cloudflare WAF cover the fundamentals. Premium security plugins and advanced WAF services are available for businesses that want additional layers, but this WordPress security checklist can be implemented at zero additional cost beyond your hosting.
Do I need a security plugin for WordPress?
A security plugin adds valuable monitoring and scanning, but it is not a substitute for secure hosting. Server-level protection (Imunify360, firewalls, DDoS mitigation) handles threats before they reach WordPress. A security plugin catches what gets through. Use both layers for the strongest defense.
How often should I update WordPress?
Enable automatic updates for minor releases (security patches) immediately. Review and apply major releases within one week. Check plugins and themes weekly. In 2025, 11,334 new WordPress vulnerabilities were discovered — a 42% increase year-over-year. Updates are your primary defense against known exploits.
Can hackers break into WordPress?
Attackers exploit known vulnerabilities, not WordPress itself. Weak passwords, outdated plugins, and missing security configurations are the entry points. The 10-step WordPress security checklist in this guide closes those openings. No website is 100% immune, but a properly secured WordPress site with layered defenses is a hardened target that most automated attacks skip.
How does hosting affect WordPress security?
Your hosting provider controls the server environment your WordPress site runs on. Server-level firewalls, malware scanning (Imunify360), DDoS protection, SSL certificates, and automated backups all happen at the hosting layer — before WordPress even loads. Traditional hosting defenses alone block only 26% of WordPress attacks. Choose hosting that includes active security tools, not just a basic server.
Secure Your WordPress Site Today
WordPress security is an ongoing process, not a one-time project. The 10 steps in this checklist build layered protection: hosting security at the foundation, smart configurations in the middle, and a monthly audit routine to keep everything current.
Start with the foundation. Secure your WordPress site with hosting that protects you from day one.
LUMINWEB WordPress Hosting includes Imunify360 security, free SSL, and automated backups — everything your site needs to stay protected.
