
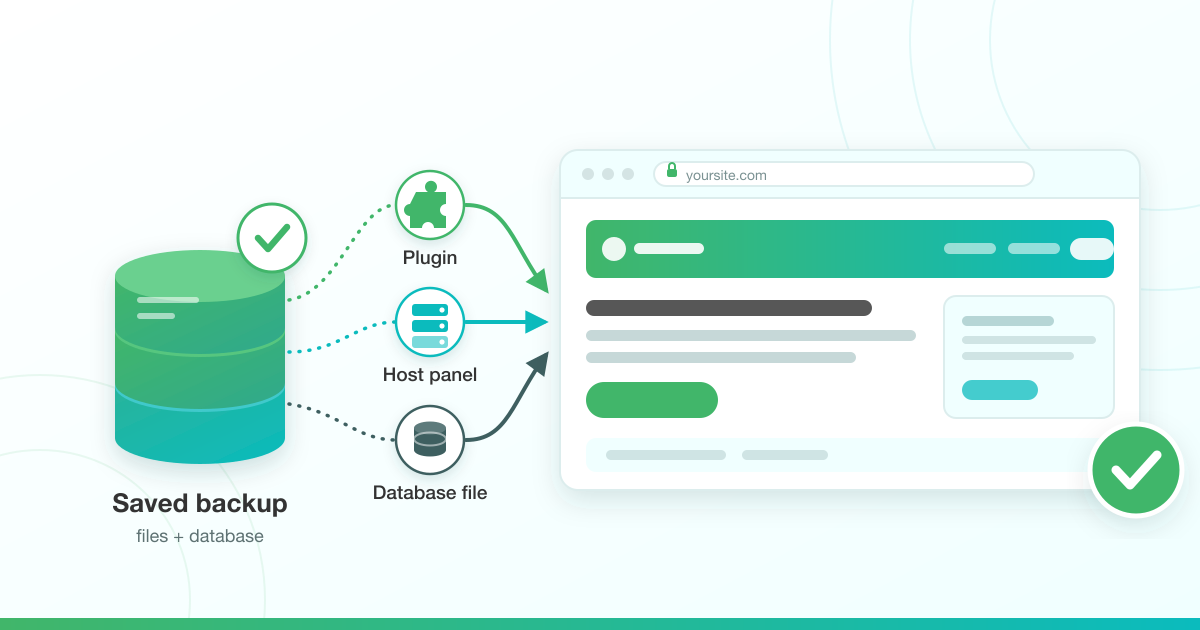



Most WordPress backup guides stop at the backup. The half that decides whether your site comes back is the restore, and that is usually the first time you open a backup file you have never looked at before.
This guide covers how to back up and restore a WordPress site using whatever you actually have available: a plugin, your cPanel or DirectAdmin control panel, your host’s backup panel, or a bare database dump. It ends with the checks that tell you the restore genuinely worked.
What a complete WordPress backup actually contains

A WordPress site is two separate things, and a copy of only one of them is not a backup.
The database holds your posts, pages, comments, users, settings and WooCommerce orders. The files hold your themes, plugins, uploads and your wp-config.php.
Find that last file before you need it, because several steps below send you back to it. wp-config.php sits in your site’s root folder, which is normally public_html. You open and edit it through your control panel’s file manager. Inside it are the DB_NAME, DB_USER and DB_PASSWORD values that connect your files to your database, and they are the first thing to check whenever a restored site will not load.
Restore only the database and your images and theme customisations are gone. Restore only the files and every post you have written is gone.
That split is also why there is more than one way to restore.
A plugin backup usually holds both halves in one set. A control panel backup often splits them into a files archive and a database archive. A .sql file on its own is the database only, and it will not bring back a single image.
Before you rely on any backup, open it and confirm both halves are in there.
How to back up WordPress with UpdraftPlus
A plugin is the fastest starting point for most site owners, because it runs inside WordPress and needs no control panel access.
UpdraftPlus is active on more than 3 million WordPress sites and, as at 7 August 2026, is tested up to WordPress 7.0.3. The current free release is version 1.26.6, published on 23 July 2026.
- In your WordPress dashboard, go to Plugins > Add New, search for UpdraftPlus, then click Install Now and Activate.
- Go to Settings > UpdraftPlus Backups.
- Open the Settings tab.
- Set a files backup schedule and a database backup schedule.
- Under Choose your remote storage, pick a destination and save. You will be sent to authorise the connection with that provider.
- Click Backup Now and let it finish.
- Open the Existing Backups tab, confirm the new set is listed, then check that the same files landed at the remote destination.
Pick the two schedules to match how often the site actually changes. A store taking orders every day and a five-page brochure site do not need the same rhythm, and our companion guide walks through how often to back up and where to store it if you want to think that part through properly. Whatever you pick, run one backup by hand first so you know the connection works before you start trusting the schedule.
Step 7 is the one people skip. A schedule that has never produced a file at the far end is not protection.
How to back up WordPress from cPanel
cPanel’s Backup Wizard sits in the Files section and steps you through both Back Up and Restore, offering a full backup or a partial backup.
The difference matters. A full backup produces one archive of the entire hosting account, and whether you can put that back yourself or whether it has to go through your host’s support team is your host’s decision rather than a cPanel setting. A partial backup lets you take the home directory and the MySQL database as separate downloads, and that pair is the combination you can restore yourself later.
- Log in to cPanel.
- In the Files section, open Backup Wizard.
- Choose Back Up.
- Choose the partial backup option rather than the full backup.
- Download the home directory archive.
- Download the MySQL database archive for your site’s database.
- Keep both files together and put the date in the folder name.
LuminWeb Shared Hosting is available with a choice of cPanel or DirectAdmin control panels, so the next section covers the DirectAdmin route as well. Not sure which one you have? Our cPanel and DirectAdmin comparison shows how to tell at a glance.
How to back up WordPress from DirectAdmin
DirectAdmin’s backup area lets you create a backup of your site’s files and databases and download it to your computer. Menu names vary between DirectAdmin versions and between hosts, so look for the backup section in your account area rather than for one exact label.
The rules are the same as in cPanel:
- Include the domain’s files and its databases in the same backup, not one without the other.
- Download the archive rather than leaving it on the server. A backup stored on the machine that failed is not a backup.
- Put the date in the filename.
- Find the restore option in the same area while you are there, so you know where it is before you need it. If it is missing, or you cannot tell what it will do, Path A and Path C in the restore section below both work from DirectAdmin. Path B is a cPanel interface and does not apply to you.
- If your backup came down as a single archive, extract it on your own computer first. Inside you will find your database as a .sql file and your site as folders of files, which is exactly what Path C needs: the .sql file for the database import, and the folders for the file upload at the end of it.
If you cannot find it, one message to your host’s support team will settle it. Do that now rather than during an outage.
How to back up WordPress from your host’s backup panel
Many cPanel hosts add a server-side backup interface alongside cPanel’s own tools. One common example, and the one this section documents, is JetBackup 5. It appears as its own icon in the Files section. These backups run on a schedule the host sets, not one you control.
Two things are worth checking before you count on it. First, whether your host exposes it to you at all: some run server backups purely as an internal safety net and restore only through a support ticket. Second, how far back the available restore points go.
Both are set by your host, so open your control panel and look, or ask support, rather than assuming.
Where it is available, this is the lowest-effort layer you have. It runs whether or not you remember it, and whether or not your own connection is up.
What it is not is an off-site copy, because it lives on the same infrastructure as your site. Pair it with a plugin backup going somewhere you control.
Already running WordPress on LuminWeb WordPress Hosting? Automatic backups for content recovery are part of the plan. It is still worth opening your panel to see exactly what you can reach yourself.
For the wider picture of what the hosting layer is doing underneath WordPress, our guide to how WordPress hosting works covers it.
How to restore a WordPress site from a backup
Start by working out what you are holding, because the backup decides the path, not preference.
- A backup set created by a plugin such as UpdraftPlus → Path A
- A backup sitting in your host’s panel, such as JetBackup 5 → Path B
- A .sql database dump, with your files somewhere separate → Path C
If you are not sure which of the three you have, the file itself tells you. A plugin backup is normally several files whose names contain your site name and the word backup. A host panel backup is not a file you hold at all, it is a date in a list inside your control panel. A .sql dump is a single file ending .sql, or .sql.gz if it has been compressed.
One thing to accept before you start: anything that happened after the backup was taken is not in it. Orders, comments, form submissions and posts created since that moment disappear once the restore completes. If any of them matter, export them first. The database is usually still readable through phpMyAdmin even when the site itself will not load.
How long it takes depends far more on where the backup lives than on how large the site is. A restore that runs entirely on the server, like Path B, moves data between two points inside the same data centre and is normally the quickest of the three. A restore that has to pull an archive down from remote storage first, like Path A, is bound by that download. A .sql import through the browser is bound by your upload speed and by whatever file size limit your host has set. Plan for minutes on a small site, and do not be alarmed by the better part of an hour on a large one.
Whichever path you take, keep the backup you started from. Do not delete it, move it or overwrite it until the site is confirmed working. A restore that goes wrong halfway is far easier to run again than to unpick.
One more caution. If the site was hacked rather than broken, restoring an older copy brings the site back and usually reinstates whatever the attacker used to get in. That situation needs what to do when a WordPress site has been hacked rather than a plain restore.

Path A: how to restore a WordPress site from an UpdraftPlus backup
Restoring from an UpdraftPlus backup happens inside WordPress, at Settings > UpdraftPlus Backups, and needs no control panel access. These steps follow UpdraftPlus’s own restore documentation.
- Log in to WordPress and go to Settings > UpdraftPlus Backups. If the site is too broken to log in at all, reinstall WordPress first, install UpdraftPlus on the fresh installation, and reconnect your remote storage.
- Click Restore. This opens the Existing Backups tab.
- If your backup set is not listed, click Rescan remote storage to pull it from your remote destination, or use Upload backup files under More tasks in the Existing Backups tab to upload the backup files from your computer.
- Find the backup set you want and click Restore in the Actions column.
- In the pop-up, tick the components you need. If the whole site is down rather than one part of it, tick everything the pop-up offers. If you include WP-Core files you will also be asked whether to restore wp-config. Putting the same site back onto the same address, you do not need to.
- Click Restore. UpdraftPlus downloads the backup if it needs to, unpacks it, and runs the restore.
- Watch the progress log and leave the page open until it finishes. A successful run ends with Restore successful!
- Expect to be signed out and to sign in again. That is normal after a database restore, not a sign that something went wrong.
The restore replaces only the components you ticked and leaves the rest alone. Tick the database on its own and your uploads, theme and plugin files stay exactly as they are now, which is what you want when a bad edit broke content rather than code.
Path B: how to restore a WordPress site from a host backup in JetBackup 5
In JetBackup 5 the files and the database are two separate restore jobs, run from the Home Directory and Databases sections. Run them separately rather than restoring the whole account.
The control names below are documented by hosting.com’s knowledge base, citing JetBackup’s own product documentation, and match what MDDHosting documents for the same interface. Your host may present a slightly different arrangement.
Restore your files:
- Log in to cPanel.
- In the Files section, click JetBackup 5.
- Click Home Directory.
- Click the backup date you want to restore from, then click Change File Selection.
- Tick the files and folders to restore. Your site normally lives in public_html, or in a subfolder of public_html if it is an addon domain. Tick Show Hidden Files if you need .htaccess back. Then click Select Files.
- Click Restore, then confirm with Restore Selected Items in the Restore Summary.
- Track the job in the Queue. It shows as Completed when the restore has finished.
Restore your database:
- Back in JetBackup 5, click Databases.
- Type your database name into the Search box and click the database in the results. If you do not know the name, it is the DB_NAME value in your wp-config.php file. JetBackup defaults to the most recent backup, so click Choose Other Backup to pick an older one.
- Click Restore, then Restore Selected Items.
- Wait for the Queue to show Completed.
Do not reach for a full-account restore instead. It destroys and recreates the entire cPanel account, which takes down every other site and every mailbox on it. Whether a full-account restore is even offered to you is your host’s decision, not a feature of the tool.
This is also the route to prefer when the database is large. The whole transfer stays on the server, so nothing is downloaded to your machine and uploaded back again, which matters a great deal on a slow or metered connection.
If your control panel has no backup section, or the section is there but read-only, the restore goes through a support ticket instead. Ask for the exact date and time you want restored, and say explicitly whether you want the files, the database, or both. That one sentence usually saves a round trip.
Path C: how to restore a WordPress database from a .sql dump in phpMyAdmin
Yes, you can restore a WordPress site without a plugin. A database dump goes back through phpMyAdmin’s Import tab, because an SQL export is the format used to restore a database. This path restores the database only; the files are a separate job.
- Open phpMyAdmin. In cPanel it is in the Databases section. In DirectAdmin it is reached from the MySQL management area.
- Select your site’s database in the left-hand sidebar. The name is the DB_NAME value in your wp-config.php file.
- Export what is in there now, before you change anything. With the database still selected, open the Export tab and save the file to your computer alongside the dump you are about to import. If that dump turns out to be incomplete, or the import stops partway through, this export is your only route back to the state you are in today.
- Do the next part only if your dump is a full copy of this site’s database. A partial export, a single-table export, or a dump from a different site will leave you missing whatever it does not contain. Where it is a full copy, clear out the existing tables first, because importing into a database that still holds a WordPress installation is what produces duplicate-table errors partway through, unless your dump deletes each table before recreating it, and you cannot tell whether it does without opening the file. In phpMyAdmin, open the database, select all of its tables using the select-all control under the table list, then apply the drop operation to that selection and confirm.
- Open the Import tab.
- Choose the dump file. phpMyAdmin accepts a plain .sql file and also gzipped or zipped dumps such as mydump.sql.gz.
- Leave the format set to SQL and start the import from the import button at the bottom of the page. Current builds label that button Import; older builds label it Go.
- If the import fails on a large file, that is a size or timeout limit rather than a broken backup. Split the dump into smaller files, or ask your host to import it from the server side.
- Restore your files separately, because phpMyAdmin touches the database only and does nothing to wp-content, your theme or your uploads. If your host’s backup panel holds a copy of the files, use the file restore in Path B above. If you are holding the files yourself, open your control panel’s file manager, go to public_html, upload the archive there and extract it in place, overwriting the folders already present. Upload one archive and extract it on the server rather than uploading thousands of individual files — it is faster, it survives a dropped connection, and it will not quietly skip files on the way. Then check where the files actually landed. Some archives expand into a wrapping folder rather than straight into public_html, and if yours did, move the contents up a level so that wp-content and wp-config.php sit directly in public_html.
If the dump came from a different domain or a different server, you are moving the site rather than restoring it, and the extra steps are covered in our guide to moving a site to a new host.
What should you check after restoring a WordPress site?
A restore is not finished when the job reports Completed. It is finished when the site loads correctly for a logged-out visitor. Work through these in order.
- Site address. If the backup came from a different domain or a staging copy, the siteurl and home values in the wp_options table still point at the old address, and the site will redirect away from itself. Fix those before anything else: open the database in phpMyAdmin, open the options table (called wp_options, unless your site uses a different table prefix), edit the siteurl and home rows, and set both to your live address with no trailing slash.
- Permalinks. Go to Settings > Permalinks and save without changing anything. That regenerates the rewrite rules.
- Database credentials. DB_NAME, DB_USER and DB_PASSWORD in wp-config.php must match the database and user you restored into. A mismatch shows up as an error establishing a database connection.
- .htaccess. It is a hidden file, so a restore that did not show hidden files skipped it.
- Caching. Clear your caching plugin and any CDN cache, then load the site in a private window while signed out. A cached page is not evidence either way.
- Reported table sizes. On MySQL 8.0 and later, cPanel notes that table statistics are cached by default, so a table’s size can take up to 24 hours to update in phpMyAdmin. A size that looks wrong immediately after a restore is usually just stale.
- A fresh backup. Once the site is confirmed working, back it up straight away so the recovered state is protected too.
Your WordPress backup and restore checklist
- Confirm your backup contains both the files and the database, not one without the other.
- Install a backup plugin and connect it to a remote destination you control.
- Run one backup by hand and confirm the files arrived at that destination.
- Open your control panel and find out whether a host-side backup panel is available to you, and whether you can restore from it yourself.
- Download one copy of files plus database to your own machine and keep the pair together.
- Note where DB_NAME, DB_USER and DB_PASSWORD live in wp-config.php, so you are not hunting for them mid-restore.
- Practise a restore once, on a quiet day, before you ever have to do it under pressure. A backup you have never restored is a backup you are guessing about.
Back up your WordPress site with confidence
The backup is the easy half. The restore is the half that decides whether your site comes back, and the difference between a stressful hour and a lost week is usually having done it once before.
Pick one method from this page and set it up today, then walk the post-restore checks once so the list is familiar rather than new.
Every LuminWeb Shared Hosting plan includes regular backups with restore functionality, and WordPress Hosting adds automatic backups for content recovery on top of WordPress-tuned servers and Imunify360 security. That is your first layer. The plugin backup going somewhere you control is your second.
Compare LuminWeb hosting plans to see what is included with each one.
