Setting up a WooCommerce store in Ghana gives you a fully customizable online store with Ghana cedi pricing, Paystack payment processing, and mobile money acceptance — all running on WordPress. This guide walks you through every step, from hosting setup to your first test order, with the specific configurations Ghanaian businesses need.
WooCommerce powers over 6.5 million live websites and holds 33-39% of the global ecommerce platform market share. It is free, open-source, and gives you complete control over your store. Combined with Paystack for payments and a mobile-friendly theme for Ghana’s predominantly mobile audience, WooCommerce is the most flexible and cost-effective way to launch an online store in Ghana.
Why WooCommerce Is the Best Choice for a Ghana Online Store
Ghana’s ecommerce market generated approximately US$1 billion in revenue in 2025, growing at 10-15% year-over-year. Ecommerce user penetration reached 30.1% and is projected to hit 35.0% by 2030. If you sell products or services, this is the time to get your store online.
WooCommerce stands out for Ghanaian businesses for three reasons:
You own your store. Unlike hosted platforms where you rent space on someone else’s system, WooCommerce runs on your own WordPress site. You control the design, the data, and the customer experience. If you ever want to switch hosting providers, your store moves with you.
It works with local payment methods. Through Paystack, your WooCommerce store accepts Visa, Mastercard, mobile money (MTN MoMo, Telecel Cash, AirtelTigo Money), and bank transfers — all the ways Ghanaian customers actually pay.
It scales with your business. Start with a simple product catalog on shared hosting. As your sales grow, upgrade to more storage or VPS hosting without rebuilding your store from scratch. For a full comparison of hosting options for online stores, see our ecommerce hosting guide for Ghana.
What You Need Before Setting Up Your WooCommerce Store
Gather these essentials before you begin:
- WordPress hosting — Your store needs a hosting plan that supports PHP, MySQL, and SSL. WordPress Hosting from luminweb includes one-click WordPress installation, free SSL, and Imunify360 security.
- A domain name — Your store’s web address (e.g., yourstore.com.gh). luminweb hosting plans include a free domain with renewal.
- An SSL certificate — Required for processing payments securely. Customers see the padlock icon in their browser, and payment gateways require it. luminweb includes free SSL certificates on every plan.
- A Paystack merchant account — Sign up at paystack.com. You need a valid Ghana business registration or personal ID to verify your account. Approval typically takes 1-2 business days.
Step 1 — Set Up Your WordPress Hosting
Your WooCommerce store in Ghana needs reliable hosting with enough resources to handle product images, customer sessions, and payment processing.
If you already have WordPress installed, skip ahead to Step 2. If you are starting fresh, install WordPress on your hosting using the one-click installer in your control panel.
For a WooCommerce store, choose a hosting plan with at least 5GB of SSD storage. If you plan to sell more than 50 products with multiple images each, the Standard plan (20GB SSD) gives you room to grow.
luminweb WordPress Hosting includes everything you need for WooCommerce: SSD storage, free SSL, automatic backups, and Imunify360 security. See our plans.
Step 2 — Install WooCommerce on WordPress
Once WordPress is running, installing WooCommerce takes about two minutes:
- Log in to your WordPress dashboard at
yourdomain.com/wp-admin - Go to Plugins > Add New
- Search for WooCommerce
- Click Install Now, then Activate
After activation, WooCommerce launches a setup wizard. Here is how to configure it for Ghana:
- Store address: Enter your business address in Ghana
- Country/Region: Select Ghana
- Currency: Select Ghana cedi (GH₵) — the currency code is GHS
- Product types: Choose what you sell (physical products, downloads, or both)
- Business details: Select your industry and current business size
Complete the wizard and you will land on the WooCommerce dashboard. The core plugin is free — you do not need to purchase any extensions to get started.
Step 3 — Configure Your WooCommerce Store for Ghana
These Ghana-specific settings make your store ready for local customers.
Currency and Pricing
Go to WooCommerce > Settings > General:
- Currency: Ghana cedi (GH₵)
- Currency position: Left (GH₵99.00)
- Thousand separator: Comma
- Decimal separator: Period
- Number of decimals: 2
Store Location
On the same page, confirm:
- Store address fields reflect your actual business location
- Selling location(s): Choose “Sell to specific countries” if you only ship within Ghana, or “Sell to all countries” if you accept international orders
- Shipping location(s): Match this to your delivery capabilities
Tax Settings
Go to WooCommerce > Settings > Tax:
- Enable tax calculations if you charge VAT/NHIL/GETFund levies
- Under Standard Rates, add a row for Ghana with the applicable tax rate
- Set Prices entered with tax to match how you set your product prices
- Choose whether to display prices inclusive or exclusive of tax in your shop and cart
Consult your accountant for the exact tax rates applicable to your product category. Tax obligations vary by business type and registration status.
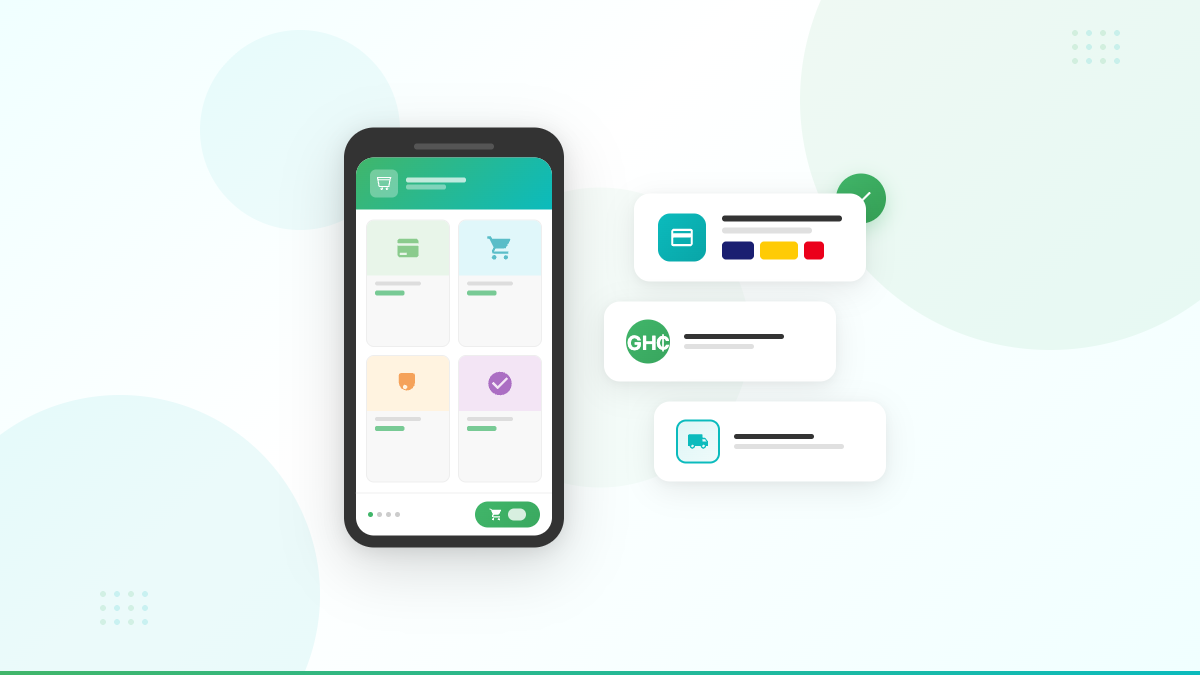
Step 4 — Set Up Paystack and Mobile Money Payments
This is the most important step for a WooCommerce store in Ghana. Paystack lets your customers pay with cards, mobile money, and bank transfers — all through a single integration.
Over 60,000 businesses across Nigeria, Ghana, Kenya, and South Africa use Paystack for payments.
Install the Paystack Plugin
- Go to Plugins > Add New
- Search for Paystack WooCommerce Payment Gateway
- Click Install Now, then Activate
Connect Your Paystack Account
- Go to WooCommerce > Settings > Payments
- Find Paystack in the payment methods list and click Manage
- Check Enable Paystack Payment Gateway
- Enter your Test Public Key and Test Secret Key from your Paystack dashboard (Settings > API Keys & Webhooks)
- Set the mode to Test Mode — you will switch to live after testing
Enable Mobile Money
In the Paystack settings within WooCommerce:
- Ensure Mobile Money is listed as an accepted payment channel
- Paystack automatically supports MTN MoMo, Telecel Cash, and AirtelTigo Money for Ghana merchants
- Customers select their mobile money provider during checkout and approve the payment on their phone
Set Up Webhooks
Webhooks notify your store when a payment succeeds or fails:
- In your Paystack dashboard, go to Settings > API Keys & Webhooks
- Set the Webhook URL to:
https://yourdomain.com/?wc-api=tbz_wc_paystack_gateway - Copy the webhook secret and paste it into the Paystack plugin settings in WooCommerce
Paystack charges 1.95% per transaction with no setup fees, monthly fees, or hidden costs (verify current rates on the Paystack website as fees are subject to change).
For a deeper look at payment gateway options beyond Paystack, read our guide on accepting online payments in Ghana.
Step 5 — Add Your Products
Go to Products > Add New to create your first product listing.
For a Simple Product (One Price, No Variations)
- Enter the Product name and a detailed Description
- In the Product data section, set the Regular price in GHS
- Add a Sale price if running a promotion
- Upload a Product image (main image) and Product gallery images — use clear, well-lit photos
- Assign the product to a Category and add relevant Tags
- Write a short Product short description that appears next to the price
For a Variable Product (Multiple Sizes, Colors)
- In the Product data dropdown, select Variable product
- Go to the Attributes tab and add attributes (e.g., Size: Small, Medium, Large)
- Check Used for variations
- Go to the Variations tab and click Generate variations
- Set the price and stock for each variation
Product Image Tips
- Use square images (800x800px minimum) for consistency across your store
- Compress images before uploading — large files slow down your store, especially for customers on mobile data
- Add descriptive alt text to every image for accessibility and SEO
Step 6 — Set Up Shipping for Your Ghana Store
Go to WooCommerce > Settings > Shipping to configure delivery options.
Create Shipping Zones
Shipping zones let you charge different rates based on the customer’s location:
- Click Add shipping zone
- Zone name: “Greater Accra” — Zone regions: Select Ghana, then specify Greater Accra Region
- Add a Flat rate shipping method with your delivery charge for Accra
- Create a second zone for “Rest of Ghana” covering all other regions
- Set a higher flat rate for deliveries outside Accra to account for longer distances
Useful Shipping Options
- Free shipping: Set a minimum order threshold (e.g., free delivery on orders above a certain amount) to encourage larger purchases
- Local pickup: Add this as a free option for customers who can collect from your location — popular for stores in Accra
- Flat rate per item vs per order: Decide whether shipping costs scale with quantity or stay fixed
Delivery Logistics
WooCommerce handles the checkout and order management. For physical delivery within Ghana, you will typically partner with a local courier service or handle deliveries yourself. Popular options include in-house delivery for Accra-based orders and third-party couriers for nationwide shipping.
Step 7 — Choose a Mobile-Friendly WooCommerce Theme
Ghana had 24.3 million internet users in 2025, with 41.8 million mobile connections. Most of your customers will browse and buy from a phone. Your theme must work flawlessly on small screens.
When selecting a WooCommerce theme, prioritize:
- Mobile responsiveness — Test the theme’s demo on your phone before installing. Buttons, product images, and the checkout form should be easy to tap and read.
- Speed — Lightweight themes load faster on mobile data connections. Avoid themes with heavy animations and large sliders.
- WooCommerce compatibility — The theme must explicitly support WooCommerce (product pages, cart, checkout).
Recommended free themes for WooCommerce:
- Astra — Lightweight, fast, and deeply integrated with WooCommerce
- Storefront — Built by the WooCommerce team, designed specifically for online stores
- Flavor — Clean design, optimized for speed
To install a theme: go to Appearance > Themes > Add New, search for the theme name, click Install, then Activate.
For more on why mobile performance matters and how to optimize for it, read our guide on mobile-first design for African audiences.
Step 8 — Launch and Test Your WooCommerce Store
Before announcing your store to customers, run through this pre-launch checklist:
Test Your Payment Flow
- Make sure Paystack is in Test Mode
- Place a test order using Paystack’s test card numbers (available in your Paystack dashboard documentation)
- Verify the order appears in WooCommerce > Orders with the correct status
- Test a mobile money payment to confirm the approval flow works
- Check that the customer receives an order confirmation email
Test the Mobile Experience
- Open your store on your phone
- Browse products, add items to the cart, and complete a test checkout
- Verify product images load correctly and text is readable without zooming
- Check that the checkout form fields are easy to fill on a small screen
Verify Security
- Confirm the padlock icon appears in the browser address bar (SSL is active)
- Ensure your store URL uses
https://, nothttp://
Go Live
Once testing is complete:
- Switch Paystack from Test Mode to Live Mode
- Replace your test API keys with your Live Public Key and Live Secret Key
- Save the settings and place one small real order to confirm live payments work
Essential WooCommerce Plugins for Ghana Stores
Keep your plugin list lean. Every plugin you add increases page load time and potential security exposure. Start with these essentials:
- Paystack WooCommerce Payment Gateway — Accepts cards, mobile money, and bank transfers in Ghana
- RankMath or Yoast SEO — Optimizes your product and category pages for Google search
- WP Super Cache or W3 Total Cache — Speeds up your store by caching pages for faster loading on mobile
- Wordfence Security — Adds firewall protection and login security on top of your host’s Imunify360
- UpdraftPlus — Automated backups of your store’s products, orders, and configuration
For a deeper look at plugin selection, see our guide on essential WordPress plugins.
How Much Does a WooCommerce Store Cost in Ghana?
WooCommerce itself is free. Here is what you actually pay:
| Item | Cost |
|---|---|
| WordPress Hosting | Starts from an affordable monthly rate — see WordPress Hosting plans |
| Domain name | Free with luminweb hosting plans |
| SSL certificate | Free with luminweb hosting plans |
| WooCommerce plugin | Free |
| Paystack transaction fees | 1.95% per transaction (verify current rates on Paystack’s website) |
| Premium theme (optional) | Free themes available; premium themes are a one-time purchase |
| Premium plugins (optional) | Most stores run fine with free plugins |
The largest ongoing cost is your hosting plan. Payment processing fees are per-transaction, so you only pay when you make a sale.
For a broader breakdown that includes website design, email hosting, and more, read our full website cost breakdown for Ghana.
Next Steps After Launching Your WooCommerce Store in Ghana
Get found on Google. Optimize your product pages and store categories for search. Install an SEO plugin and write unique product descriptions that include the terms your customers search for. Our guide on how to get your store found on Google walks you through the fundamentals.
Set up Google Business Profile. If you have a physical store or serve a specific area, set up Google My Business for your store to appear in local search results and Google Maps.
Monitor your store performance. Check WooCommerce Analytics regularly for sales trends, top products, and customer behavior. Set up Google Analytics to understand where your traffic comes from.
Keep your store secure and updated. Update WordPress, WooCommerce, and all plugins when new versions are released. Schedule regular backups and monitor your security dashboard.
For broader guidance on building your online presence, see our guide on how to build a business website in Ghana.
Launch your WooCommerce store on luminweb WordPress Hosting — one-click WordPress install, free SSL, and free domain included. Get started today.
